I recently completed a large residential loss project in the lower mainland of Vancouver BC. We captured damages post-incident and after remediation using Visual Plan 360° Image Capture Process to create a digital twin comparison and to build a 2D plan diagram and 3D model. The project was done for an insurance company we can’t name at this time.
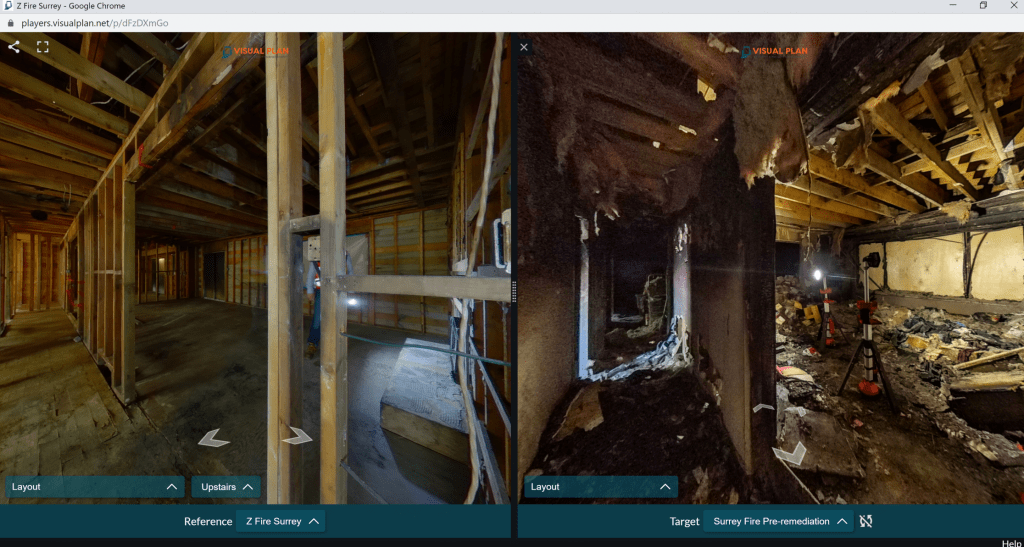
Fire Post-Incident
The house had nearly zero ambient light given. All the doors and windows were boarded shut except the entrance. We wore Tyvek suits and respirators due to the asbestos and it was very hot so less time onsite was preferable. We also brought a pair of Milwaukee light stands typically used by fire departments, brought by @Glen Miller, former RCMP investigator, who assisted with the lighting.
We approached this capture with the MADV360 using 3 bracketed photos in HDR mode. This is our standard go-to camera for large scale 360° Capture and we have 5 cameras. We use the MADV on most large projects, such as the Gaylord Palms Orlando (by Marriott) captured May 13-17, 2019 which was a 65-acre property with nearly 4M square feet of data captured in 5 days. The camera delivers a balanced color and good resolution for a 24mp 360° camera priced at only $300 USD. The capture App works fairly well, despite the occasional issue when operating for long periods of time on large scenes if you don’t shut down other 3rd party Apps on the phone.
My biggest concern on the first capture was getting enough lighting and the right position of the lighting so that we could understand the scene and so the images would turn out well. As a result, we neglected some of the standard workflows and did not take enough imagery. Glenn helped us to focus on burn patterns and areas an investigator would look at more closely, and we quickly learned to position the lighting away from the camera to avoid blow out, preferring to position lighting to the edges of the camera where any image derogation would be at a minimum. Overall, we got what we needed, but I would defiantly approach the next scene differently. I plan to find a more portable light source, as it was very clumsy working with the Milwaukee light stands.
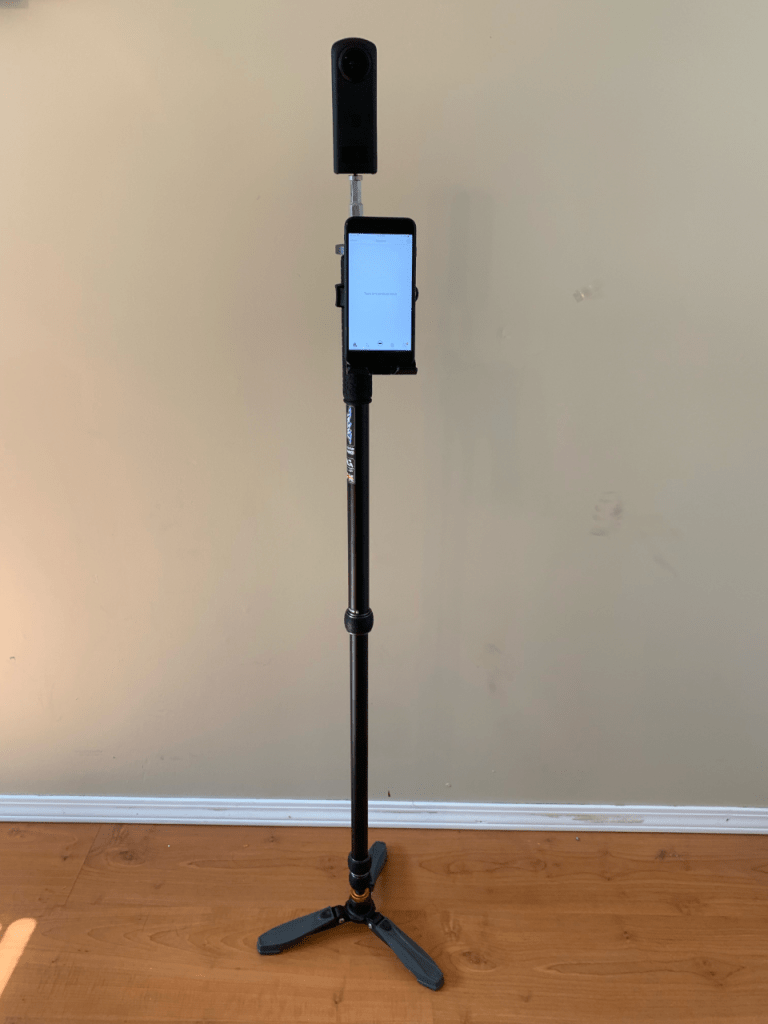
Like many fire scenes, there is really no flat surface to place a tripod comfortably. Luckily, this did not matter as the Visual Plan software auto-levels the data from any direction. The photos can be taken at 90° to the ground so just point and shoot. This gives you the option to carry the camera on a stick or use a monopod. You can elevate the small camera into exposed ceilings, closets, or under stairwells. Typically, we would prefer a hard had camera configuration, but with the 8’ ceilings and given that I am over 6’ tall, this capture method would not work. As such, we settled for a monopod with a base so we could get into tight spaces and keep the camera at about 4’ tall with a tilting base to be flexible with the floor.
The capture process took about 20min upstairs, 20min downstairs, and 20min for the outside site area using a hard hat configuration.
Processing The Scene Data
As mentioned, we did not take enough photos around corners, through hallways and I believe that the change in lighting conditions when moving the light stands did not help with the registration process. Visual Plan relies on pixel matching, unlike Matterport using structured light. The benefits of pixel matching are that there are no issues using the solution outdoors where structured light sensors have issues, and we can scan in large open spaces with very little geometry, where structured light sensors need to be closer to walls and surfaces.
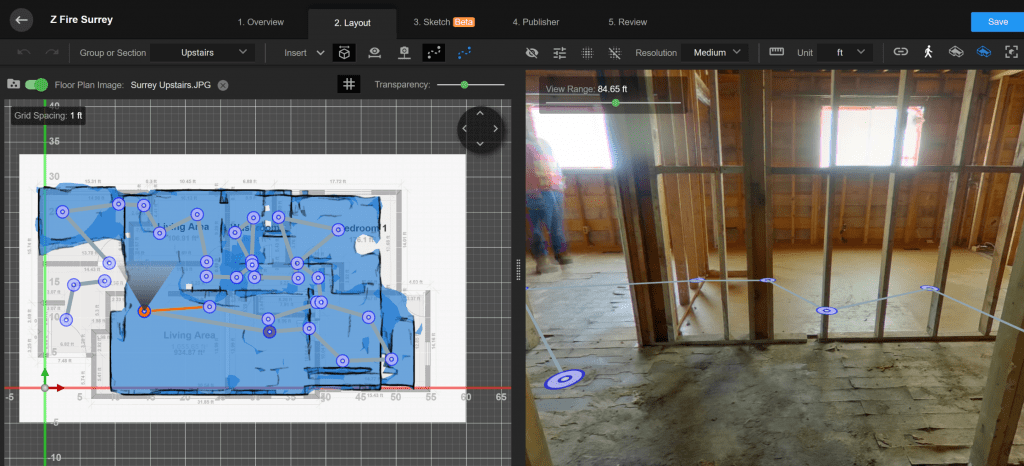
The new Visual Plan App in version 2.0, not yet released, has several new workflow options to assist with effective registration, where you can indicate directionality on a pre-loaded to-scale map and indicated clusters r leverage the AR sensor when using the helmet configuration reducing the need for manual alignment.
The big issue with the MADV for bracketed photos is that it produces 3 raw bracketed which need to be merged in a product like PTGui. Although this is not difficult, and you can batch process the images, it does add an extra step I would like to avoid. After the Panos were processed, the upload took only 15min and cloud processing in Visual Plan was done in 30min. I then spent about an hour putting the project together.
Next, I cropped and imported a satellite image to a rough scale. Total time included: 1hr capture, less than 2hr process and 1hr putting the project together. This was more time than we wanted to spend, but we gathered far more data than we would have with site SLR photos alone.
Second Capture Post Remediation
A month later, we captured the same property post-remediation with the new Richo Theta Z1 in HDR. I also purchased 2 portable 30M 1500 Lumen work lights for the project.
The basement level was captured twice to include a comparison with the MADV and it was clear that the Richo Theta Z1 was the winner!
The site was far easier to capture without the debris and the portable lights assisted nicely. During the first capture, we were not able to navigate the stairways to connect the top and bottom floors and the rooms were full of debris so fewer photos were taken than I would have preferred.
For the second capture, we took 49 images downstairs and 34 images upstairs. We completed capture in less than an hour, about the same time as the first capture with more than double the images.
The Richo App is very stable and offers a realistic image in HDR so you know what you captured from the App display. The MADV shows a lower quality image on the App so it’s a little more difficult to know what you have as the images still need to process before results can be evaluated.
Given that the Theta Z1 sensor is 4 times larger than the MADV, the image quality was far better in the low light conditions. The Theta Z1 has an excellent built-in HDR mode that requires no stitching or HDR fusion and has amazing dynamic range, especially its shadow range. It also seems to have very strong flare resistance.
After the basement was captured, I automatically uploaded the images to the Visual Plan server and 30min later the project was ready to view with very little to adjust. This was a much better workflow, avoiding download, stitching, and processing in PTGui and saved considerable time while offering results onsite.
Visual Plan creates a photogrammetric mesh allowing you to take quick measurements. Accuracy is 1% over 30 feet, or about 5cm is my rule of thumb to be conservative.
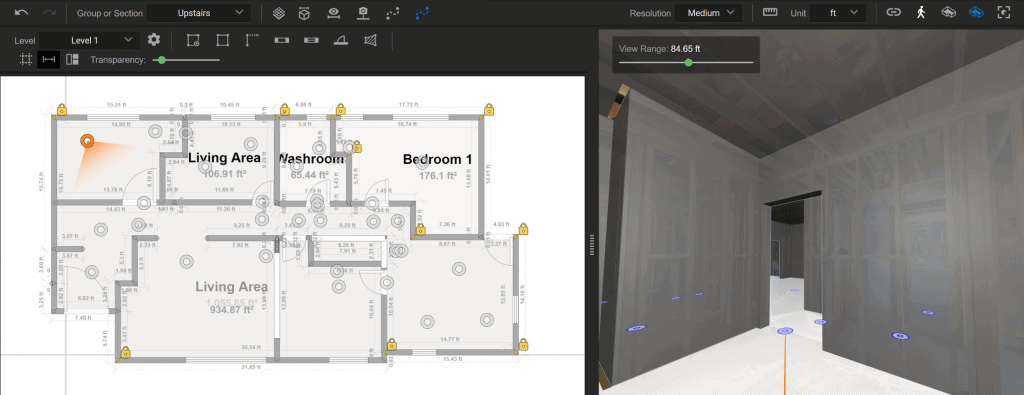
I have started using the Visual Plan Sketch tool more frequently and really like it. Despite a few bugs (its still beta), you can create basic floor plans quickly and export either a DXF or IFC file. You can then re-import the IFC file for a BIM 3D compare to the existing As-Built image capture which is cool. You may want to take the diagram into Revit and do a more complete model, but the possibility is there with this workflow.
Overall, I learned a lot on this project and look forward to the next insurance loss project. I expect we will continue to drive downtime on site while doing a better job with the photo capture. Next time I will be doing some testing with alternative light placement. And I would prefer to have 6-8 of the same lights I tested above and layout a larger section so that the lighting stays consistent. I expect this will also reduce the risk to registration and projects will be delivered without additional alignment. I am also looking forward to testing the new Visual Plan App on the next insurance project to leverage the phone AR or flagging image to cluster the image groups. I am also looking forward to a much larger project next time.
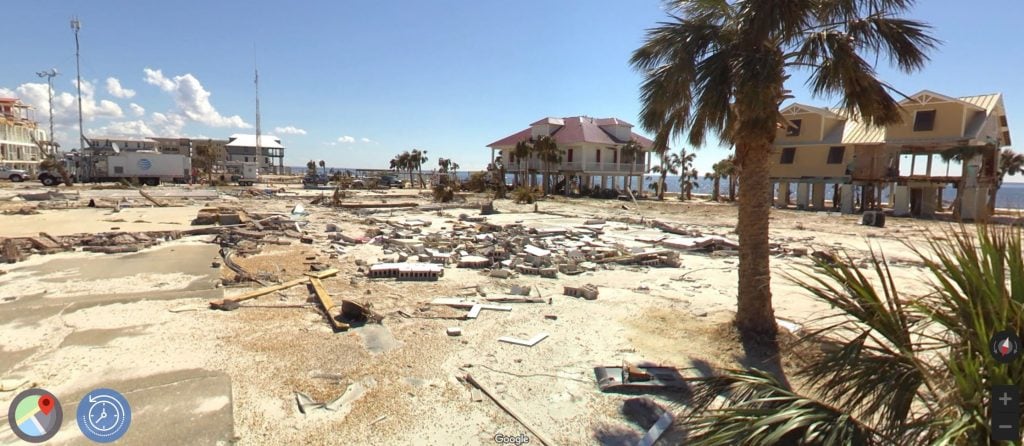
Stay tuned as September 23rdI will be in Mexico Beach Florida re-capturing Hurricane Michael’s rebuild efforts on the 1-year anniversary. We have 360° capture from a vehicle done in 2015 to compare images taken 3 days post-disaster and then again on the 1-year anniversary of the rebuild. We are now a licensed reseller of this vehicle-mounted mobile mapping solution so feel free to reach out with any questions. This should be a very fun project and look forward to learning more and sharing with everyone at that time.
Best Regards,
Kelly Watt | CEO & Founder of Visual Plan Inc.
Office 1(206) 202-4220 | kelly@visualplan.net| www.visualplan.net
Collaborate, Share, and Plan with Rapid 360° Capture